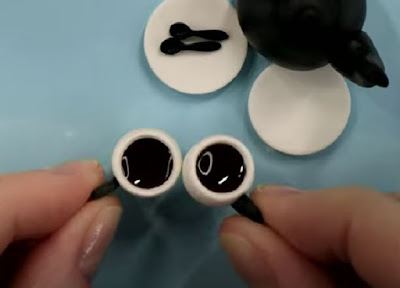
Crafting a Charming Dollhouse Miniature Coffee Set with Hearts Pattern
Creating miniature items for dollhouses is a delightful and creative hobby that allows you to bring intricate and whimsical details to your miniature world. In this blog post, we will guide you through the process of making a dollhouse miniature coffee set with a charming hearts pattern. This set includes a teapot, two cups of coffee, and two saucers with small spoons. The pattern will be achieved using a combination of liquid polymer clay and dry pastels, and the intricate details will be drawn using a regular needle. So let's dive into the step-by-step instructions and unlock your inner miniaturist!
Materials you will need:
Liquid polymer clay
Dry pastels (in desired colors)
Regular needle
Sculpting tools (optional)
Paintbrushes
Aluminum foil or baking tray
Oven or heat gun (for curing the clay)
Protective gloves (optional)
Clear varnish (optional)
Dollhouse display or shelf to showcase your creation
Step 1: Preparing the clay and pattern colors
Start by conditioning the liquid polymer clay according to the manufacturer's instructions. Once it's soft and pliable, mix in the desired amount of dry pastels to achieve the colors you want for the hearts pattern. Remember to thoroughly mix the colors until they are evenly distributed throughout the clay.
Step 2: Forming the coffee set pieces
Create the teapot, cups, saucers, and spoons by molding the colored clay. You can use your hands or sculpting tools to shape each piece. Keep in mind the scale of your dollhouse and adjust the sizes accordingly. Smooth out any rough edges or fingerprints with your fingers or a sculpting tool.
Step 3: Baking or curing the clay
Place the clay pieces on aluminum foil or a baking tray and bake them according to the instructions provided with the liquid polymer clay. Alternatively, you can use a heat gun to cure the clay. Ensure that you follow safety precautions and use protective gloves if necessary.
Step 4: Adding the hearts pattern
Once the clay pieces have cooled down, it's time to create the hearts pattern. Dip the needle into the liquid polymer clay or water to prevent sticking. Carefully draw the heart shapes onto the surface of the teapot, cups, saucers, and spoons. You can arrange the hearts in a repeating pattern or create your own unique design.
Step 5: Enhancing the pattern
To give the hearts more dimension and depth, lightly dust the surface with dry pastels of a contrasting color. Use a soft brush to blend the pastels onto the surface, focusing on the inside of the hearts. This will make the pattern more visually appealing and realistic.
Step 6: Finishing touches
Once you're satisfied with the pattern, you can choose to apply a thin layer of clear varnish to protect the clay and give it a glossy finish. This step is optional but recommended for a polished look. Allow the varnish to dry completely before moving on to the next step.
Step 7: Displaying your creation
Now that your miniature coffee set is complete, find a suitable place in your dollhouse or on a display shelf to showcase your craftsmanship. Arrange the teapot, cups, saucers, and spoons with care, creating an inviting scene that will captivate anyone who sees it.
Crafting a dollhouse miniature coffee set with a hearts pattern is a gratifying project that allows you to bring a touch of whimsy and elegance to your miniature world. By using liquid polymer clay, dry pastels, and a regular needle, you can create intricate details that make your coffee set truly unique. Let your creativity soar as you imagine the delightful scenes that will come to life with this charming addition to your dollhouse. Happy crafting!
Thanks for stopping by today!


Comments
Post a Comment