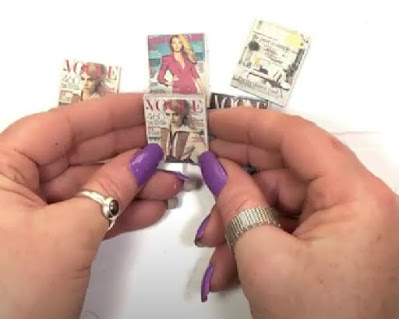
Crafting Delightful Dollhouse Miniature Tiny Books and Fashion Magazines
Dollhouses have always been a source of fascination, allowing us to create and curate miniature worlds of our own. One delightful way to enhance the authenticity of your dollhouse is by incorporating tiny books and fashion magazines into the scene. These adorable props add a touch of realism and charm to any miniature space. In this blog post, we will guide you through the process of creating your very own dollhouse miniature tiny books and fashion magazines.
Materials Needed:
Thin cardboard or cardstock
Craft paper or patterned scrapbooking paper
Ruler
Craft knife or scissors
Glue or adhesive
Miniature printouts or magazine cutouts
Optional: Tweezers, small paintbrush, clear nail polish (for added durability)
Crafting Tiny Books:
Step 1: Measure and Cut
Using a ruler, measure and mark out the desired size for your miniature book on the cardboard or cardstock. The standard size for a dollhouse miniature book is approximately 1 inch by 3/4 inch, but feel free to adjust the dimensions to your liking. Carefully cut along the marked lines using a craft knife or scissors.
Step 2: Create the Book Cover
Choose a craft paper or patterned scrapbooking paper for the book cover. Cut a piece of paper slightly larger than the cardboard cutout. Place the cardboard on the backside of the paper, and fold the edges of the paper over the cardboard, securing them with glue or adhesive. Smooth out any wrinkles or air bubbles for a neat finish.
Step 3: Add Pages
To create the pages of your miniature book, cut several thin strips of paper slightly smaller than the book cover. Align the strips and glue them together, creating a small stack of pages. Apply a thin layer of glue to one edge of the pages and attach them to the inside of the book cover.
Step 4: Customize and Decorate
This is the fun part! Use miniature printouts, such as book covers or text pages, or create your own tiny illustrations to personalize your books. Glue these images onto the pages, creating the illusion of a fully illustrated book. You can even add details like book titles or author names using a small paintbrush and acrylic paint.
Crafting Fashion Magazines:
Step 1: Gather Miniature Printouts or Magazine Cutouts
Look for miniature fashion magazine printouts online or use cutouts from actual fashion magazines. These should be scaled down to fit the size of your dollhouse.
Step 2: Create the Magazine Cover
Cut a piece of thin cardboard or cardstock to the desired size for the magazine cover. Glue the miniature printout or magazine cutout onto the cardboard, ensuring it is centered and aligned. Allow the glue to dry completely.
Step 3: Assemble the Magazine
Cut several rectangular strips of plain or patterned paper slightly smaller than the magazine cover. Stack these strips together and glue them along one edge, creating the magazine's pages. Attach the pages to the inside of the cover, aligning them neatly.
Step 4: Optional Enhancements
For added durability, you can apply a thin coat of clear nail polish to the cover of the magazine. This will protect it from wear and tear over time. Additionally, you can use a small paintbrush and acrylic paint to add tiny details, such as headlines or fashion sketches, to the pages.
With a little creativity and some basic crafting supplies, you can bring your dollhouse to life by adding tiny books and fashion magazines. These delightful props not only enhance the overall authenticity of your miniature space but also offer an opportunity for personalization and creative expression. So, grab your materials, unleash your imagination, and start crafting these charming accessories for your dollhouse today!
Thanks for stopping by today!


nice work!
ReplyDelete