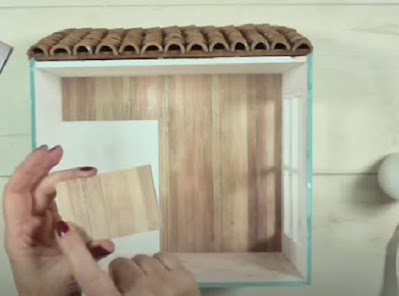
Creating a Delightful Dollhouse Miniature Toy Store: A DIY Guide
Dollhouse enthusiasts and miniature collectors find great joy in creating intricate and charming scenes that capture the essence of real-life settings. One of the most beloved additions to any dollhouse is a miniature toy store, filled with tiny treasures and nostalgic charm. In this blog post, we will guide you through the process of creating your very own dollhouse miniature toy store using readily available materials and simple techniques. So, let's dive into the world of miniatures and embark on this delightful crafting adventure!
Materials:
To bring your miniature toy store to life, gather the following materials:
Paperboard or lightweight wooden board
Modeling paste
Acrylic paints or chalk
White glue
Cardboard and decorated paper for interior details
Step 1: Design and Planning:
Start by envisioning the layout and design of your miniature toy store. Consider the era, theme, and style you wish to portray. Sketch out the floor plan and make notes about the different sections within the store, such as the display area, checkout counter, and storage shelves. This initial planning will help guide you throughout the construction process.
Step 2: Building the Structure:
Using paperboard or lightweight wooden board, cut out the walls, floor, and ceiling of your toy store according to your planned design. Assemble the pieces using white glue, ensuring that the structure is stable and secure.
Step 3: Adding Texture and Detail:
To create a realistic facade for your toy store, apply modeling paste to the exterior walls. Use a spatula or your fingers to create textured patterns, such as bricks or wood grain, mimicking the look of a traditional storefront. Allow the paste to dry completely.
Step 4: Painting and Finishing:
Once the modeling paste has dried, it's time to add color and character to your toy store. Use acrylic paints or chalk to paint the exterior and interior walls, as well as the floor and ceiling. Choose vibrant colors for the exterior, and lighter shades for the interior to create a visually appealing contrast. Consider adding details like signage, window frames, and a welcoming storefront entrance to make your toy store come alive.
Step 5: Interior Design:
Now comes the fun part—decorating the interior of your miniature toy store. Utilize cardboard and decorated paper to create shelves, display units, and counters. Craft small toy replicas, posters, or tiny packaging to place on the shelves, making the store look inviting and authentic. Pay attention to details like miniature price tags, signage, and decorations to enhance the overall charm.
Step 6: Final Touches:
Take a step back and admire your miniature toy store. Look for any areas that need touch-ups or additional details. Consider adding a storefront awning, miniature lighting, or even a dollhouse figurine to complete the scene. Let your creativity guide you as you add those finishing touches.
Creating a dollhouse miniature toy store allows you to unleash your imagination and brings joy to both the maker and the viewer. Through careful planning, building, and decorating, you can create a captivating scene that will transport you to a whimsical world of childhood nostalgia. So gather your materials, let your creativity flow, and embark on this delightful crafting journey. Happy miniature toy store making!
Thanks for stopping by today!


Comments
Post a Comment