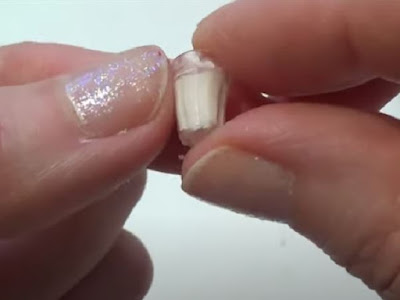
Crafting Dollhouse Miniatures: Shaping Plastic Tubing with a Glue Gun
Creating dollhouse miniatures allows you to unleash your creativity and construct intricate, detailed worlds in a small scale. When it comes to crafting these tiny marvels, plastic tubing can be a versatile material to work with. By using a glue gun, you can shape and mold soft plastic tubing to create a wide range of miniature objects, adding charm and realism to your dollhouse. In this blog post, we'll explore the process of shaping plastic tubing using a glue gun, unlocking endless possibilities for your miniature creations.
Materials Needed:
Plastic tubing of various diameters (available at craft stores or online)
Glue gun and glue sticks
Craft knife or scissors
Heat-resistant gloves
Protective eyewear
Sandpaper or emery board
Optional: Acrylic paints and brushes for coloring
Step-by-Step Guide:
Gather your materials: Start by collecting all the necessary materials, including plastic tubing in different diameters to suit your desired miniature objects. Ensure you have a glue gun with corresponding glue sticks, a craft knife or scissors, heat-resistant gloves, and protective eyewear.
Prepare your workspace: Select a well-ventilated area with a flat surface to work on. Lay down some newspaper or a protective mat to catch any glue drips or plastic shavings.
Measure and cut the tubing: Determine the length you need for your miniature object and cut the plastic tubing accordingly. Use a craft knife or scissors to make clean cuts, ensuring the edges are straight and even.
Heat up the glue gun: Plug in your glue gun and let it heat up according to the manufacturer's instructions. Make sure to wear heat-resistant gloves to protect your hands while handling the glue gun.
Shape the plastic tubing: Once the glue gun is hot, pick up a piece of plastic tubing and carefully apply heat to one end using the glue gun's nozzle. Move the nozzle in a circular motion around the tubing to evenly distribute the heat. Be cautious not to overheat the plastic, as it may melt or deform.
Mold the tubing: As the plastic tubing becomes soft and pliable, gently bend, twist, or shape it into the desired form using your fingers or heat-resistant tools. Take your time to ensure precise shaping, as the plastic cools and hardens quickly.
Secure the shape: Once you achieve the desired shape, hold it in place for a few seconds until the plastic cools and sets. If necessary, apply a small amount of glue from the glue gun to reinforce any weak joints or to attach additional parts.
Finishing touches: After shaping all the necessary plastic tubing pieces for your miniature object, use sandpaper or an emery board to smooth out any rough edges or imperfections. This step will give your creations a polished and professional appearance.
Optional: Painting and decorating: If desired, you can paint the plastic tubing using acrylic paints to match the desired color or add intricate details. Use small brushes and take your time to achieve a precise and realistic finish.
Incorporate into your dollhouse: Once your plastic tubing creations are complete and dry, carefully integrate them into your dollhouse scenes or dioramas. Experiment with different combinations and arrangements to add character and personality to your miniature world.
By using a glue gun to shape soft plastic tubing, you can unlock a world of possibilities when it comes to crafting dollhouse miniatures. With a bit of creativity and patience, you can mold plastic tubing into various shapes and forms, adding realism and charm to your tiny creations. Remember to prioritize safety by wearing protective gear and working in a well-ventilated area
Thanks for Stopping by today!


Comments
Post a Comment