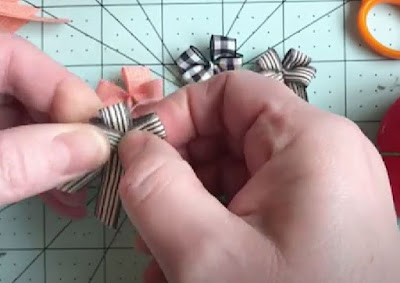
How to Make a Dollhouse Wreath Bow
Dollhouses are a delightful way to bring miniature worlds to life, and every tiny detail matters when it comes to creating an enchanting scene. One accessory that adds a touch of charm and elegance to dollhouse wreaths is a dainty bow. Whether you're crafting a wreath for a miniature Christmas scene or simply want to add a decorative touch to a dollhouse door, making a tiny bow is easier than you might think. In this quick tutorial, we'll guide you through the process of creating a dollhouse wreath bow that will add a delightful finishing touch to your miniature creations.
Supplies:
3/8" ribbon (8-11" of length per bow)
Scissors
Needle
Thread
Step 1: Prepare the Ribbon
Start by cutting a piece of 3/8" ribbon to the desired length. For a small bow, a length of 8-11 inches should suffice. You can experiment with different lengths to achieve the desired bow size for your dollhouse wreath. Trim the edges of the ribbon neatly to prevent fraying.
Step 2: Create the Bow Loops
Take the ribbon and fold it in half, ensuring that both ends meet. Hold the folded end between your thumb and forefinger, creating a loop on one side and two ribbon ends on the other. The loop will serve as the base for your bow.
Step 3: Secure the Loops
To keep the loops in place, take a needle and thread and pass it through the center of the loop, making sure to catch both sides of the ribbon. Pull the thread tight to secure the loop, but be careful not to pull too hard, as it may distort the shape of the bow.
Step 4: Create the Bow Tails
Now it's time to create the bow's tails. Take the remaining ribbon ends and trim them at an angle to give them a neat appearance. Adjust the length of the tails according to your preference. Shorter tails will create a more compact bow, while longer tails will lend an elegant look.
Step 5: Attach the Bow
To attach the bow to your dollhouse wreath, you can either use a small dab of glue or sew it directly onto the wreath with a needle and thread. If using glue, make sure to use a small amount to prevent it from seeping through the ribbon and making it look messy. If sewing, pass the needle and thread through the back of the wreath, securing the bow in place. Knot the thread at the back to secure it firmly.
Step 6: Finishing Touches
Once the bow is attached, you can fluff and adjust the loops and tails to your liking. Gently tug on the loops to create a fuller appearance, and shape the tails for a more refined look. If desired, you can also trim the tails further or add small embellishments, such as tiny beads or pearls, for an extra touch of elegance.
And there you have it—a lovely dollhouse wreath bow ready to adorn your miniature creations! By following these simple steps, you can create adorable bows that will add a touch of charm to any dollhouse wreath. Whether you're crafting for the holiday season or simply want to enhance the aesthetics of your dollhouse, these miniature bows are sure to make a delightful impression. Get creative, experiment with different ribbon colors and patterns, and enjoy the process of bringing your miniature world to life, one bow at a time!
Thanks for stopping by today!


Comments
Post a Comment