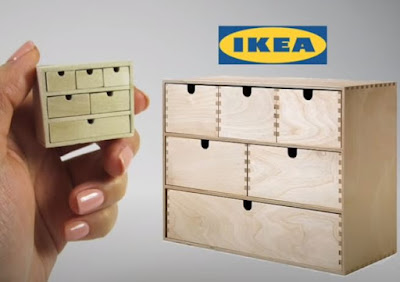
DIY Dollhouse Miniature: Craft Your Own IKEA-Inspired MOPPE Chest of Drawers with Jumbo Popsicle Sticks
Dollhouse enthusiasts and miniature lovers, get ready to embark on a creative journey as we dive into the world of DIY dollhouse furniture. In today's tutorial, we will be crafting a miniature version of the beloved IKEA MOPPE chest of drawers using readily available jumbo popsicle sticks. Get ready to unleash your inner craftsman and transform these humble materials into a stylish addition to your dollhouse!
Materials Needed:
1. Jumbo popsicle sticks
2. Craft glue
3. Acrylic paint (white, light gray, and any additional colors for customization)
4. Small paintbrushes
5. Craft knife or scissors
6. Sandpaper
7. Ruler
8. Pencil
9. Small drawer pulls or knobs (optional)
Step 1: Gather Your Materials
Before diving into the crafting process, ensure you have all the necessary materials at hand. Organize your jumbo popsicle sticks, craft glue, paints, brushes, and any additional accessories you'd like to add to your miniature chest of drawers.
Step 2: Design Your Miniature MOPPE Chest
Using a ruler and pencil, sketch out the design of your miniature chest of drawers on a piece of paper. The MOPPE chest typically features a stack of drawers with a simple and clean design. Adjust the dimensions to fit the scale of your dollhouse and make sure it resembles the IKEA original.
Step 3: Build the Frame
Start by laying out the popsicle sticks to create the frame of your miniature chest. Cut the sticks to the desired length using a craft knife or scissors. Use craft glue to secure the pieces together, forming the basic structure of the chest.
Step 4: Create the Drawers
For the drawers, cut smaller sections of popsicle sticks to form the front and sides of each drawer. Assemble the pieces using glue, ensuring the drawers are proportionate to the overall size of the chest. Repeat this process for each drawer, allowing the glue to dry completely before moving on.
Step 5: Add Details
To mimic the signature MOPPE design, consider adding small dividers between the drawers using thin popsicle stick strips. Sand any rough edges for a smooth finish.
Step 6: Paint Your Miniature Chest
Once the glue has fully dried, it's time to bring your miniature MOPPE chest to life with paint. Use a base coat of white or light gray paint to replicate the IKEA aesthetic. Add any additional colors or patterns to match your dollhouse's theme or your personal style.
Step 7: Finishing Touches
For a realistic touch, consider adding small drawer pulls or knobs to your miniature chest. You can use beads, tiny buttons, or even craft store findings for this purpose. Attach them securely with craft glue.
Congratulations! You've successfully crafted your very own DIY dollhouse miniature inspired by the IKEA MOPPE chest of drawers. This project allows you to unleash your creativity and add a touch of modern furniture to your miniature world. Display your creation proudly in your dollhouse and share your masterpiece with fellow dollhouse enthusiasts. Happy crafting!
Thanks for stopping by today!


Comments
Post a Comment